Bank Reconciliation is a necessary task undertaken to determine and account for any discrepancies between your bank statement and the transactions you have entered into Sage.
Sage 200 offers 3 ways of reconciling a bank account:
- Manually, using a printed bank statement.
- Automatically, using E-banking to import your bank transactions.
- Automatically, using Bank Feeds to download your bank transactions.
This blog will focus on reconciling your bank manually using a printed bank statement. Further information regarding these reconciliations can be found at the following links for Bank Feeds and E-banking.
Sage 200 Tips – Bank Reconciliation
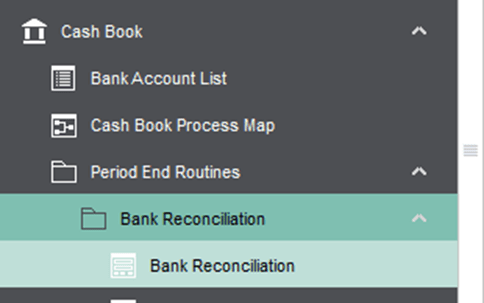
To start a bank reconciliation, navigate to Cash Book > Period End Routines > Bank Reconciliation > Bank Reconciliation:
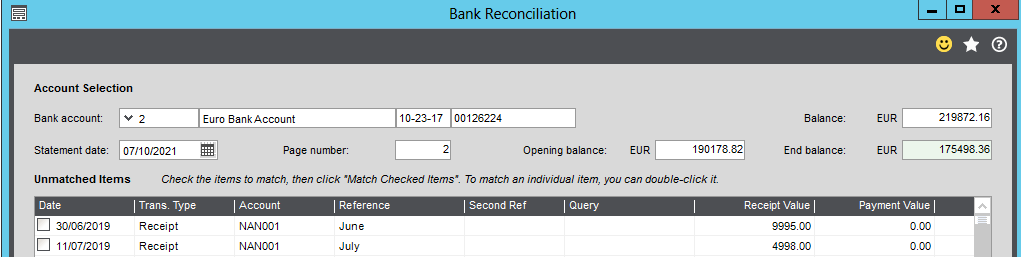
This will open the main bank reconciliation screen. From here you will simply need to select your bank account and all the unreconciled transactions will appear. Before you can start comparing and reconciling these transactions, you will also need to enter the statement date, page number and end balance on your bank statement into Sage 200.
The bank reconciliation screen is split into 2 parts; unmatched items and matched items. To complete the reconciliation, compare the unmatched items to your bank statement and if they agree select the check box on the right-hand side of the transaction. Once you have selected all matching transactions, select the Match Checked Items button. This will move the checked items into the matched items section.
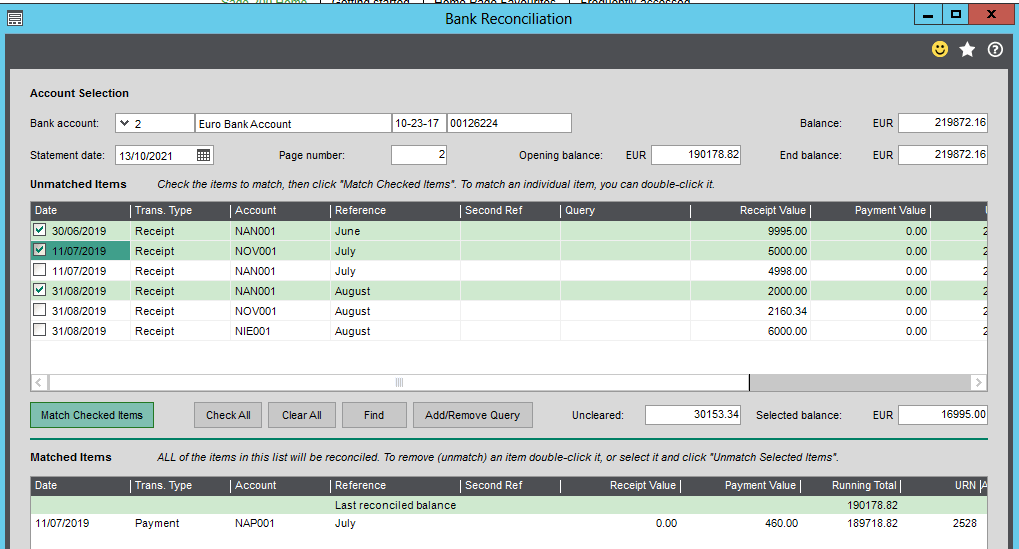
Alternatively, there is a Check All button available which will move all the transactions to the lower screen. Any transactions that do not reconcile can then be unmatched using the Unmatch Selected Items button.
As you are matching transactions you may come across bank transactions which have not been entered into Sage 200, such as interest or bank fees. These can be entered into Sage 200 directly within the reconciliation screen. This is achieved by selecting the appropriate transaction from the drop-down list in the Add Transaction of Type field.
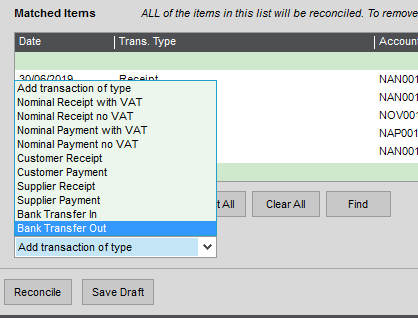
This will open the relevant transaction screen to allow you to enter the required details. Saving the transaction will return you to the reconciliation window with this transaction added to the matched items section.
Once you are happy that the bank reconciliation is complete, check the balance at the bottom of the screen. If the difference field is showing 0.00 you can then click Reconcile to complete the process.

Keep an eye out for future blogs from the team at AlphaLogix!
Your Accounts System | Our Expertise | Let’s Talk…
Our team of Accredited Sage 200 Product Specialists have many years of experience and are here to help, from initial consultation through to: development, implementation, training and on-going support.
If you would like any further information or a demonstration of Sage 200, please contact us:
Email: info@AlphaLogix.co.uk
Tel: 0330 043 0140
Kind Regards,
Samantha Bridgewater | Sage Accounts Technician
Request a Call Back to Discuss Sage 200.
• Organise a Personalised Demonstration of Sage 200
• Request Pricing or Organise a Quote