Act! CRM 2017 European Summit
15th February 2017
AlphaLogix News – Sage 2017 Summit, London
10th April 2017One of the powerful features that sets Infor CRM (formerly SalesLogix) apart from other CRM systems is the built-in Query Builder. The Infor CRM Query Builder provides users with a creative tool designed to build dynamic groups of user-defined lists of information. Once created, these Infor CRM Groups can be shared with everyone or with specific sets of users.
Infor CRM Groups, or lists, are situated throughout the system; from Customers and Contacts to Opportunities, Service/Support Tickets and Campaigns. Unlike many other CRM systems where the creation of new groups is considered an administrative function, Infor CRM has the advantage of making this powerful feature accessible to end-users.
Infor CRM Groups
Throughout Infor CRM there are various preset groups that will provide users with lots of useful information. The preset groups presented to you depend upon the area of Infor CRM that you’re currently accessing. For example within the Opportunities area there are useful Groups such as ‘All Opportunities’, ‘Closed – Won’ and ‘My Open Opportunities’.
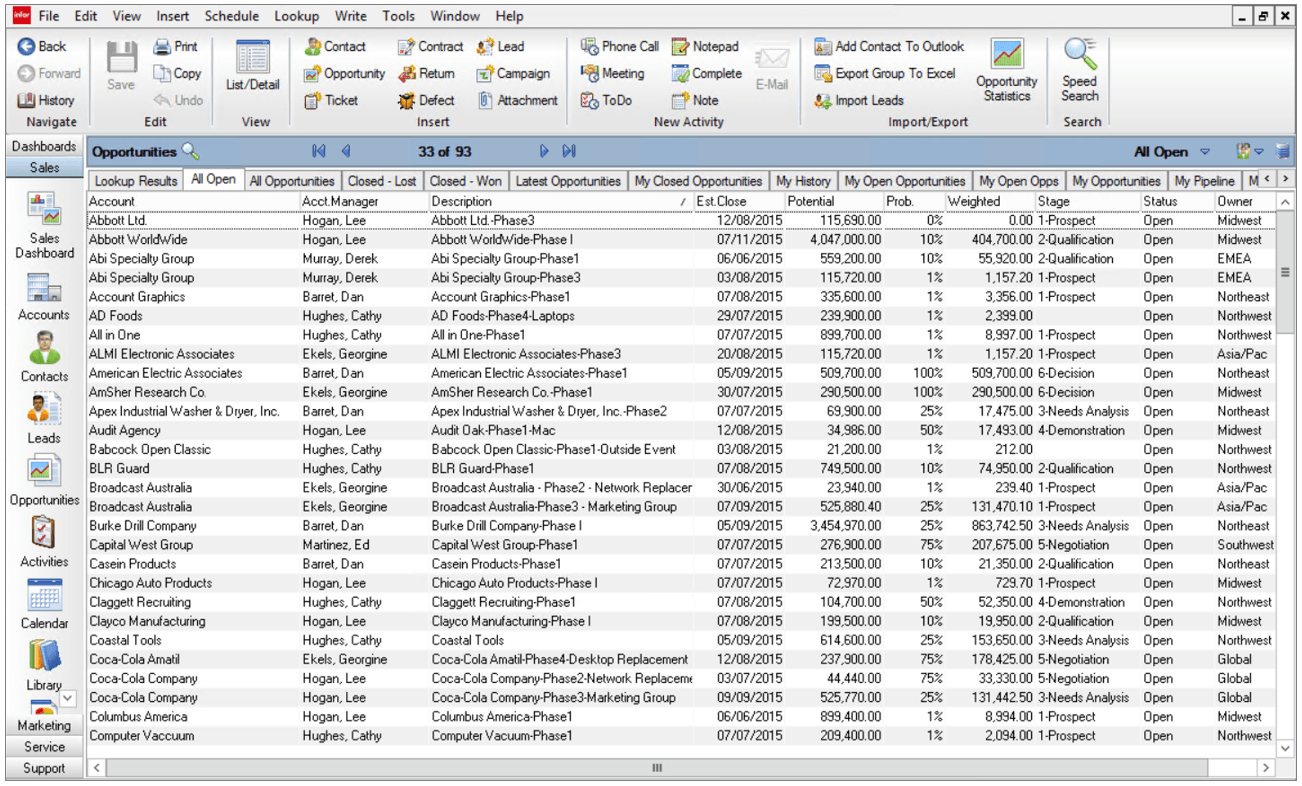
In the Accounts area you have groups available to you such as ‘All Accounts’, ‘My Accounts’, ‘Latest Accounts’ and ‘Imported Accounts’. In the Tickets area you have groups such as ‘All Open’, ‘My Tickets’, ‘Punched In’ and ‘Unassigned’.
However there may come a time when these groups aren’t giving you all of the information you need. The Query Builder provides end-users with the tool to create their own dynamic groups throughout Infor CRM, and I’m going to show you how to create a new, custom filtered group!
Infor CRM Groups – Master Group
Within each area of Infor CRM there is a ‘Master Group’ – an unfiltered list of all records within that area. In Opportunities the group is called ‘All Opportunities’, in Accounts the group is called ‘All Accounts’ etc. When creating a new group it is quite common to use one of these Master Groups as a template because they’re an unfiltered list of all records in the area, and they will already have most or all of the columns of information that you need.
Let’s say we want to create a new group to show us all of the Opportunities that are currently in the ‘Decision’ stage, so that we can better analyse our expected short-term revenue.
Infor CRM Groups – Create a New Group
From the Opportunities list view, right-click onto the ‘All Opportunities’ tab and select ‘Copy Group…’. You will be presented with the Infor CRM Query Builder, and this is split into three main sections; Tables, Fields and Properties.
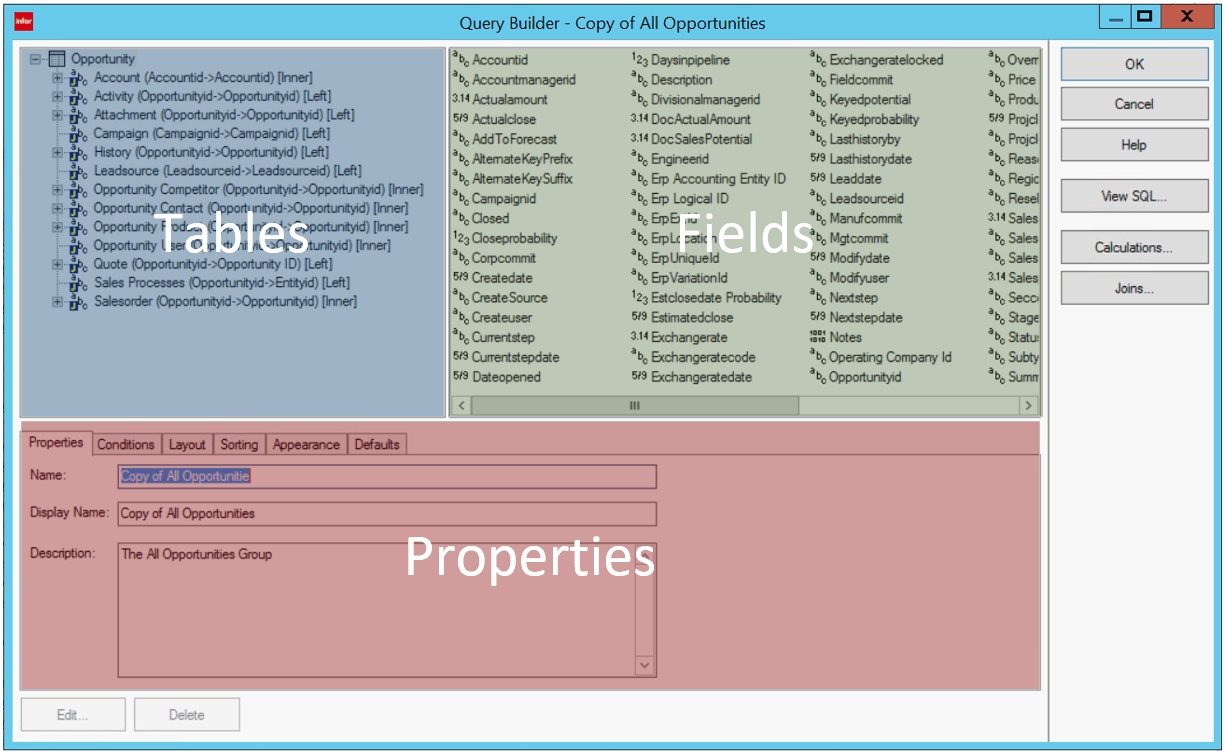
The Fields are represented within the groups as columns, and the Fields available within the green section depend upon which Table you have currently selected within the blue Tables section. Typically all of the Tables and Fields you will need to use are already available to you, however more can be added if required.
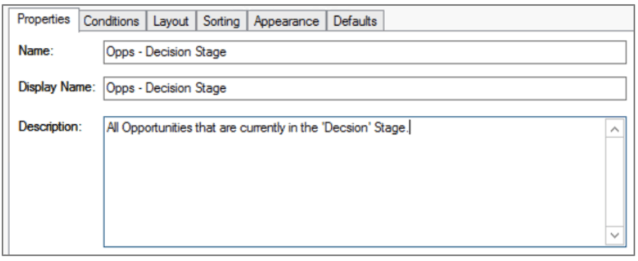
First give your new group a name and description within the Properties tab.
Infor CRM Groups – Conditional Filter
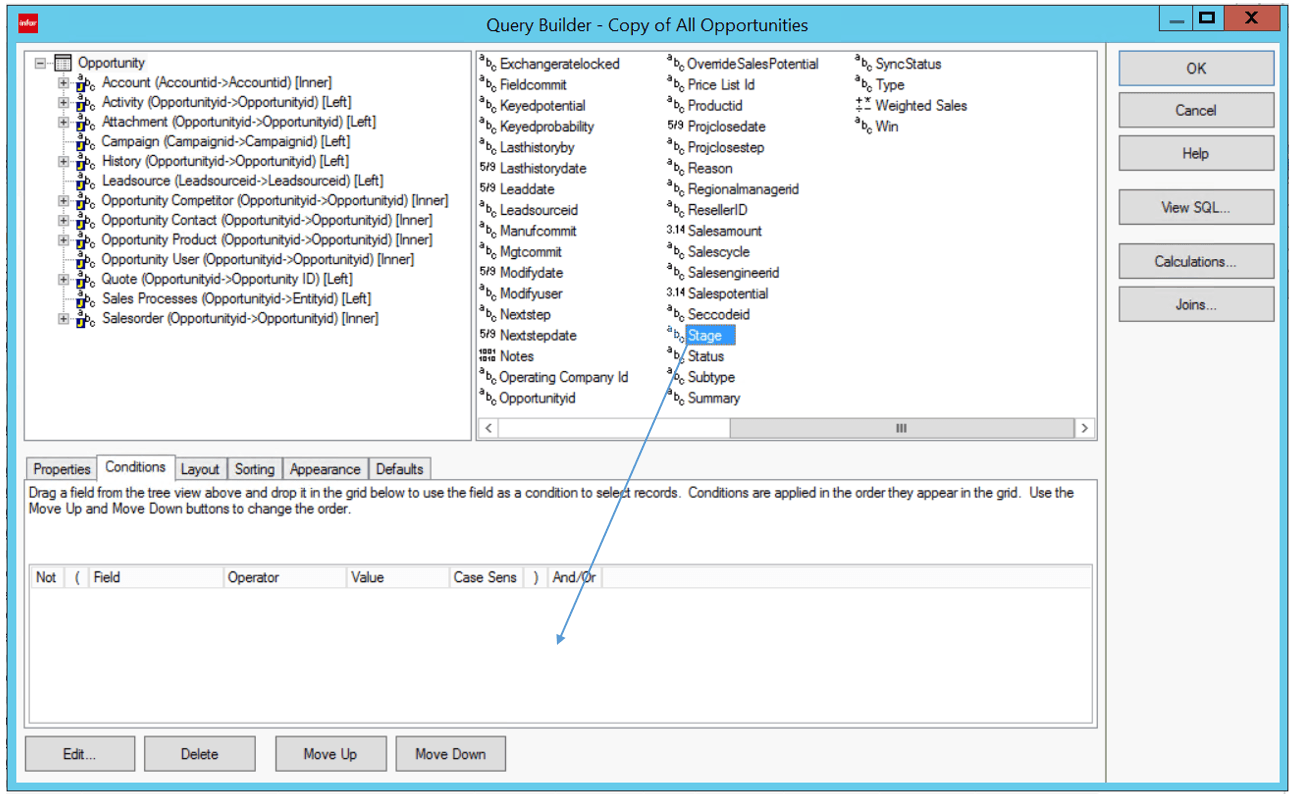
Select the Conditions tab – this is where the items within the group can be filtered. For this new group of Opportunities that are in the ‘Decision’ stage, I will need to use the ‘Stage’ field to apply the condition, so drag and drop the ‘Stage’ field into the Conditions area.
A ‘Conditions’ window will open prompting you to assign the condition you wish to apply to the Field.
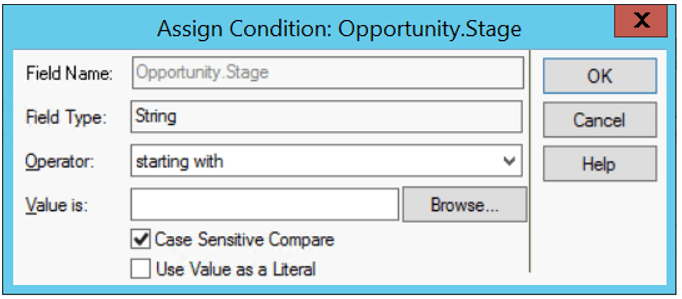
The Field Name and Field Type are locked for editing, but selecting the Operator drop-down list will present a list of options to choose from. Select ‘equal to’.
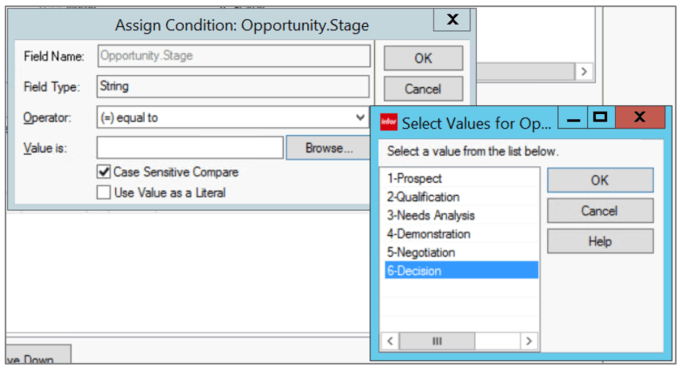
Selecting ‘Browse…’ will present you with a list of items that can be chosen, and the items presented will depend upon the Field that you’ve chosen.
For example if I’d chosen the ‘createdate’ Field then I would be presented with a calendar.
Select ‘6 – Decision’, followed by OK.
The new condition will appear within the Conditions area, and this will ensure that only those Opportunities that are currently at the Decision stage will appear in the group.

Infor CRM Groups – Layout
In order to choose which columns you want to include in the group, select the Layout tab. Similar to the Conditions tab, fields can be dragged and dropped into this area and they will be presented in your new group as a column. Fields can also be moved left/right in this location to better refine your group columns.

Select OK and your new group will be created.
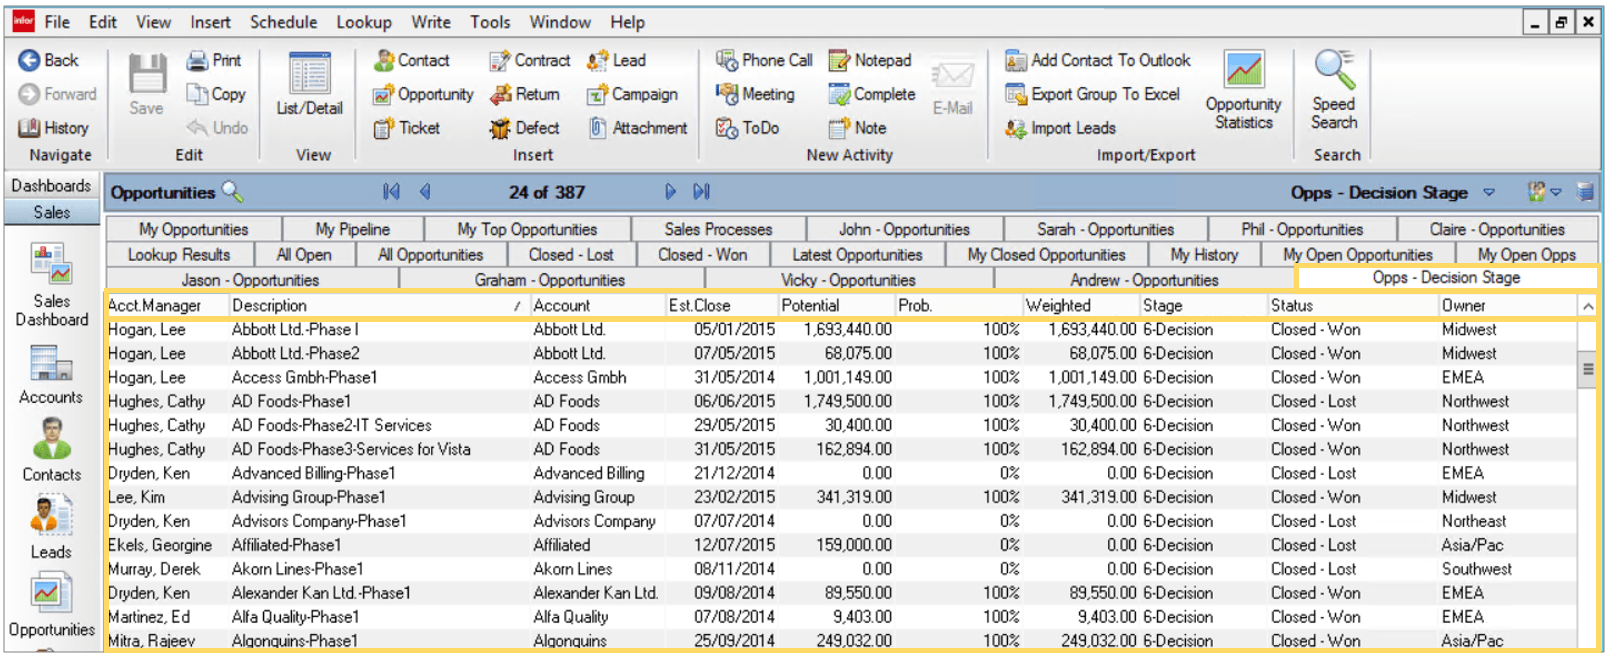
Infor CRM Groups – Stacked Tabs
It is good practice to delete old groups that you’re not using anymore. Right-click onto any of your custom groups and select Delete Group.
As you create more groups they may become difficult to see, so a great tip that we teach whilst providing end-user training is to stack your tabs.
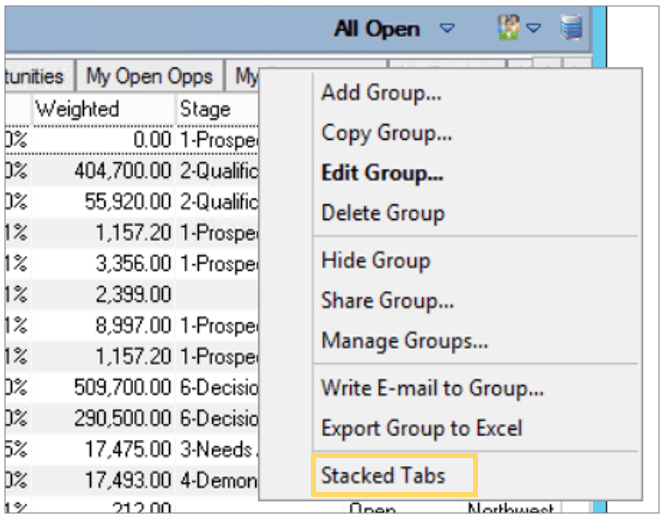
Right-click onto any of the group tabs and select Stacked Tabs.
This will stack your group tabs onto various levels so you can see them all.
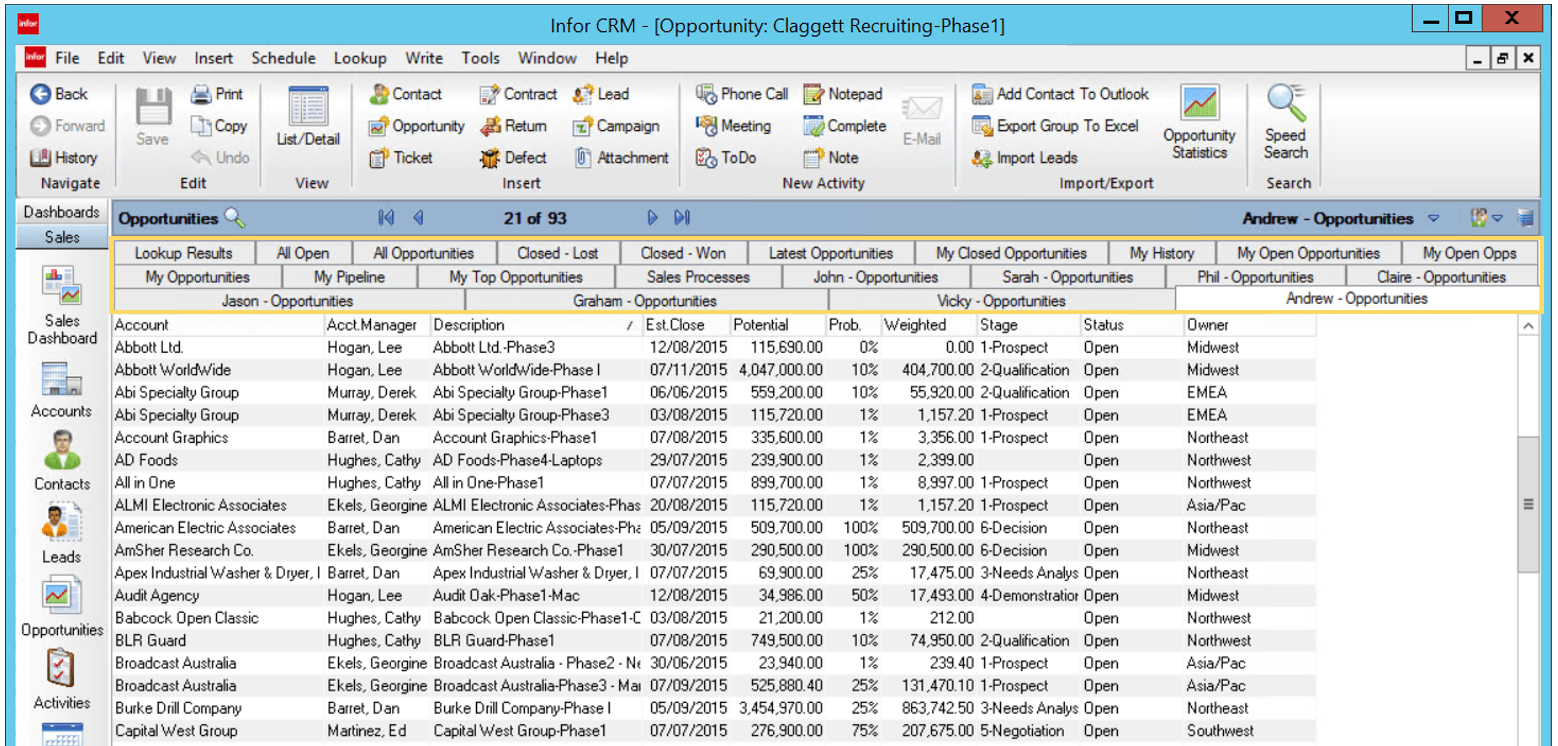
Creating groups in Infor CRM isn’t as daunting as you may expect. Spend a little time creating your own groups with multiple conditions in order to gain better insights into the information contained in your Customer Management database.
Keep an eye out for future blogs from the team at AlphaLogix!
Our team of Accredited Infor CRM Product Specialists have many years of experience and are here to help, from initial consultation through to: development, implementation, training and on-going support.
If you would like any further information or a demonstration of Infor CRM, please contact us:
Email: info@AlphaLogix.co.uk
Tel: 0845 259 3141

Kind Regards,
Richard Owens | Product Specialist

